Showing posts with label home decor. Show all posts

Friday, August 17, 2012

A Beachy Display

I can't tell you how thrilled I was when I opened up my new
 Front Porch Kit: Just Add Water
and saw all the pretty coastal colors! 
I knew instantly I wanted to make stuff to add
 to my beachy display on the buffet in our entryway.


One of my favorite projects was the Maya Road chip board album.

I started the project by adding more holes to the bottom of the chipboard...
 this was I would tie it with twine nice and
 tight so it would be able to stand according style.
 After a quick coat of paint I designed each page individually.
 I had so many fantastic pictures for a very resent beach trip...
 the hardest part was picking the pictures!
 I really liked working with the sand paper. 
 It adds such a fun texture. 
The little crushed shells also added so much to the pages. 
 I used a puddle of diamond glaze to adhere it.

The kit had so many fun little things to use as embellishments...
 the clustering was a snap!!

And then I found this lovely turquoise cake plate that made the perfect display at a local store for just $11... yay me!!  And yay you, because we still have a few Just Add Water Kits left! So if you have not bought yours yet... head over HERE and get one and is you are still thinking about it... check out the list of Front Porch Girl blogs in my side bar.  This girls have made the most beautiful things with their kit- you will be truly inspired!!

Wednesday, May 16, 2012

"Sew" Darling Photo Pocket

Now, that I caught your attention
with all the fun sneak peeks...
let me share what I made
with my Front Porch "Sew Artsy" Kit....


The came with lots of beautiful vintage style fabric.
I was thrill when I saw it because
it matched Adelyn's bedroom perfectly.
I have also been working a
whimsical gallery wall for her room...

I used the fabric, trim, and "Hattie" hoop to
make this cute photo pocket.
I love that it has so many fun textures
 and it is functional,
 as we have already added a photo
and her ticket stubs from Elmo Live.

In a nut shell... I painted "Hattie Hoop" and
 began stretching fabric and trim to fit,


I used a simple slip stitch to gather the black fabric
 for even more dimension.
And made one of my favorite fabric flowers
 out of some of the green fabric
and backed it with lace.
The "Addy" tag was colored with glimmer mist
and then stamped with her name.
My favorite party of the project is this chipboard covered monogram.
First, I used a little iron on stiffener to help trace and cut out the letter,
then hand stitched the border befor hot gluing it on to a piece of chipboard.

Just look at all this fun stuff that comes in the "Sew Artsy" Kit....
 paper, fabric, trims, buttons, lace, zippers, rub ons,
 "Hattie" the hoop. vintage embellishments
and an entire vintage pattern, canvas tags,
 stickers, wooden spools.... and more!
we could say its a crafty girls  "Jack Pot"

 and order your "Sew Artys" kit. 
While you are there check out the inspiration gallery...
 let me tell you there just can't be a more talented group
 of designers out there- AMAZING!

Tuesday, November 8, 2011

Sccrappy Fall Canvas

It is about time I pulled out my scrapbook paper!

I made this adorable canvas... so much fun!

Friday, February 4, 2011

Scrappy Love

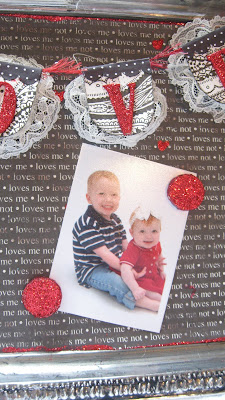
I am feeling the love for my new magnetic Valentine decor! Would you believe this beauty was once this tacky dollar store tray?
Really is there nothing some pretty paper, ribbon, and glitter can't make pretty?


Even this glitter heart came in a bag of eight from the good ole Dollar Tree!
And if you were wondering-
why yes, you can paint, glue, and cover a paper doily in glitter!


My Loves!


Sunday, January 30, 2011

Happy Valentine's Day

Here is a mini banner I made for Valentine's Day. I used the coasters from OutBack... they are free!


Wednesday, January 5, 2011

Faith Wall Hanging

Last year I joined Ali Edwards and lots of other bloggers in selecting a word to focus on for the new year. She calls it OLW (one little word). My word last year was FAMILY and I made a banner for our mantle to remind us what we were focused on. This year my word is FAITH and I made this wall hanging to help us think about building our FAITH everyday.
I am so in love with these colors. They just feel so light and fresh... like you should feel when you are walking in full FAITH! These papers are from Close To My Heart's Splendor collection.
The backing was an old cereal box that I traced this pretty shape onto. I had the shape from an old Technique Tuesday kit. If you don't have a shape you like, you can search on line for clip art and trace it that way. I traced the shape again and cut out the inside to make the frame. It is stacked up with a double layer of 3D foam... that makes it look almost like a shadow box.


Here is my birdie... lovely, huh? I kinda free handed her...again on a box for chip board. Her wings are used dryer sheets... ironed, cut, and layered! I also used them as ties on the hanger and bottom trim. I am sure there is a name for the fan folded circle I stuck her on- I am so addicted to these things! They are super easy and add loads of texture to layouts and cards!

Ta-da! I used the handy ole Crop-o-Dile for to punch the holes for the wire. And all the beads are from an old beaded wine bottle cover -ha. Now, I am thinking something similar for a house warming gift or Valentine decor!